Article Categories
Blogue & Help & Store

Replace the imaging IBM & Lexmark
To replace the imaging drum:
- Remove any packing material from the replacement drum.
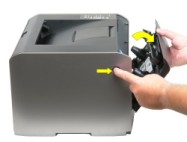
- Open the printer front door by pressing the button on the side of the printer chassis..
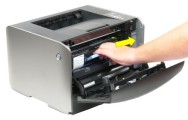
- Pull on the blue handle to remove the toner cartridge and imaging drum together.
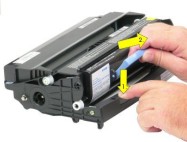
- Press the button on the imaging drum frame to separate the toner and drum.
- Fit the existing toner cartridge into the new drum.
- Fit the assembled toner and drum to the printer, close the front door.
Replace the imaging IBM & Lexmark

How to reset the photoconductor counter
| Read comments | Leave your comment |
Overview
A Photoconductor (PC) Life Warning or a Repla...
Showing 1 to 1 of 1 (1 Pages)
Article tags